Pumpkin painting with ScotchBlue Painters Tape

Our family is excited about Halloween this year. My oldest saw one house decorated on our street and decided we were behind on our decorations.
The first decoration we decided to make is painted pumpkins We have tried carving them in previous years but the kids get tired shortly after we cut off the top. I will save my carving time for after bedtime this year.
We headed out to our mommy group with ScotchBlue painter’s Tape, paint, and a few of our garden pumpkins. The kids had a blast!!
We dried off our pumpkins really well. Wet pumpkins and tape don’t mix.
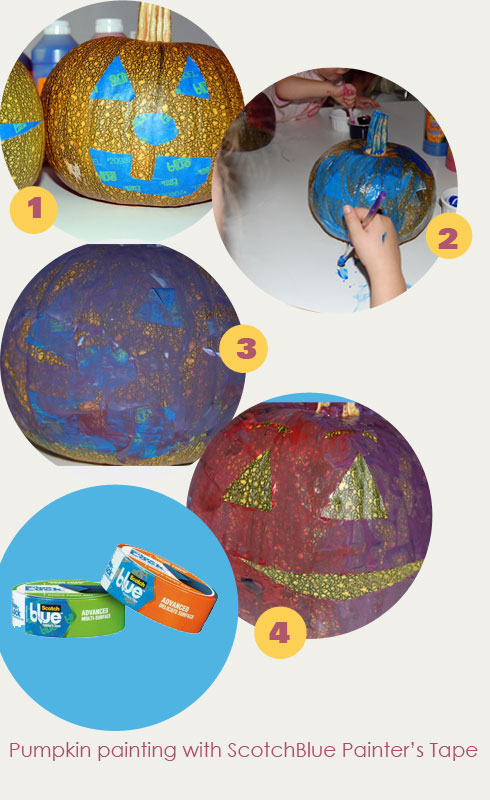
Using ScothBlue painters Tape, we made some simple shapes and helped the kids stick the faces onto the pumpkins. Make sure you rub the tape on well to get good lines.
Then we stood back and let the kids paint away! They painted and painted until we said there was probably enough paint on each pumpkin. We let the pumpkins dry for a little bit (due to the heavy amount of paint on them!). It took aprox one cookie and juice box break to let the paint dry just a touch. Then we peeled off the tape on the pumpkins and let them fully dry.
Our sppoooooooky pumpkins will great you at our front door!
Want to paint your own pumpkins or have another project you want to paint? Leave a comment and we’ll get you some ScotchBlue Painters Tape free!
ScotchBlue Painters Tape has a tutorial on how to make your own Halloween snack bowl as well here.


